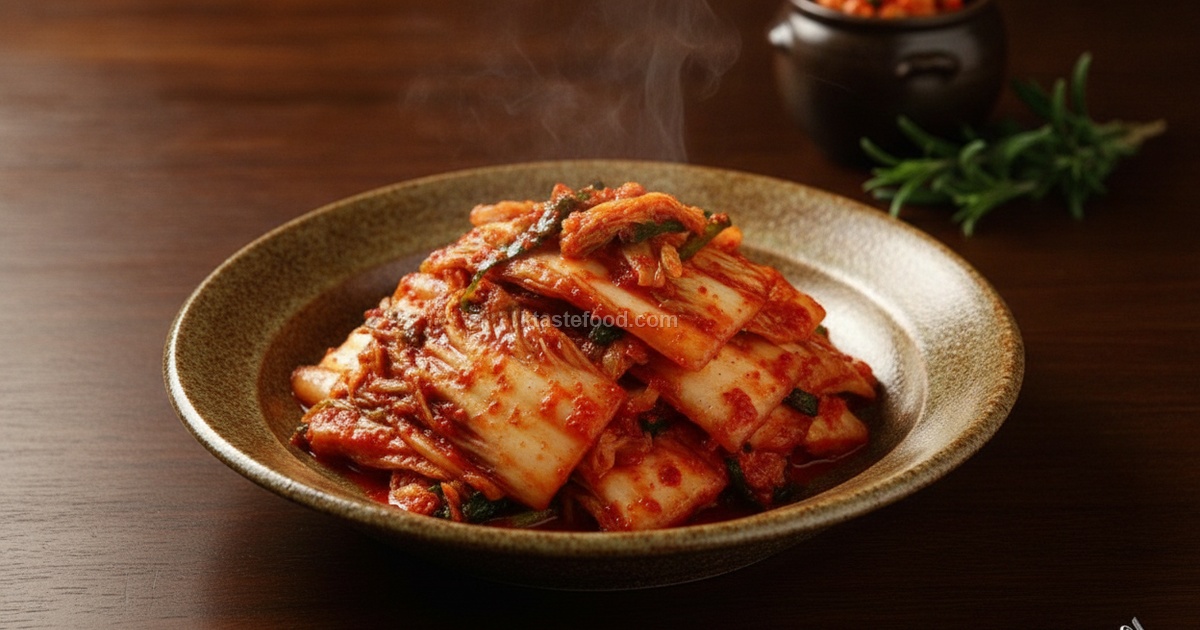
There’s a special comfort in a kitchen filled with the promise of homemade kimchi. For generations, my sister (Noona) has perfected her Baechu Kimchi recipe, a cornerstone of our family meals, embodying the true spirit of Korean culinary tradition. This isn’t just about food; it’s about connecting with heritage, nurturing gut health, and sharing a labor of love. Every head of napa cabbage, lovingly salted and bathed in a vibrant, handcrafted seasoning, tells a story of patience, flavor, and an unwavering dedication to authentic taste. Join me in recreating this deeply satisfying, utterly essential Korean staple, imbued with the warmth and wisdom of Noona’s kitchen.
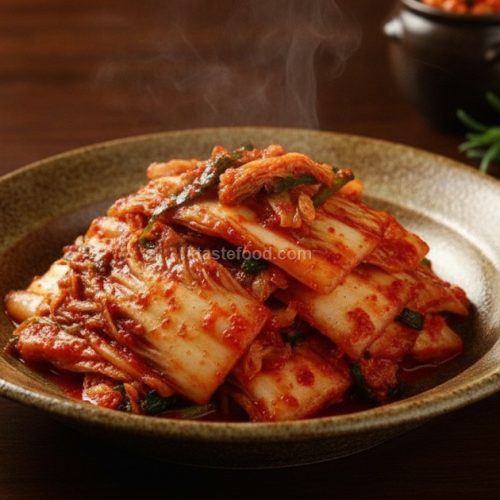
Mastering Authentic Baechu Kimchi: Sister’s Secret to Perfectly Fermented Napa Cabbage
⚡ Nutrition: 50 kcal (per 1 serving / 1인분 기준)
🍳 Required Equipment: Large Brining Container/Tub, Large Stockpot (for paste), Blender or Food Processor, Extra-Large Mixing Bowl, Colander, Sharp Chef’s Knife, Measuring Cups and Spoons, Rubber Gloves
🌱 Dietary & Lifestyle Tags: Dairy-Free, Naturally Fermented, Spicy, Umami-Rich
Equipment
- Large Brining Container/Tub
- Large Stockpot (for paste)
- Blender or Food Processor
- Extra-Large Mixing Bowl
- Colander
- Sharp Chef’s Knife
- Measuring Cups and Spoons
- Rubber Gloves
Ingredients
Ingredients
- 3 large heads Napa Cabbage (Baechu) approx. 7-9 kg total
- 200 g (7 oz) Green Onions (Jjokpa) cut into 5cm (2-inch) pieces
- 200 g (7 oz) Fresh Red Chili Peppers (Hong Gochu) roughly chopped for blending
- 3 cups (720g / 25 oz) Coarse Sea Salt (Jeorim Sogeum) for brining cabbage
- 1 L (4.2 cups) Water for initial salt solution for brining
- 3 cups (360g / 12.7 oz) Korean Chili Flakes (Gochugaru) adjust to preferred spice level
- 200 g (7 oz) Garlic peeled
- 40 g (1.4 oz) Ginger peeled
- 350 g (12.3 oz) Onion roughly chopped for blending
- 1/2 cup (120 ml / 4 fl oz) Korean Anchovy Sauce (Kkanari Aekjeot)
- 1/2 cup (120 ml / 4 fl oz) Korean Green Plum Extract (Maesil Cheong) or substitute with sugar/honey
- 1/2 cup (120g / 4.2 oz) Fermented Shrimp Paste (Saewoo Jeot) finely chopped or mashed
- 1/2 cup (60g / 2.1 oz) Chili Seeds (Gochu Ssi) adds a deeper chili flavor and texture
- 2 tbsp (30 ml) Sugar granulated white sugar
- 600 ml (2.5 cups) Water for flour paste
- 6 tbsp (50g / 1.7 oz) All-Purpose Flour (Milgaru) or sweet rice flour (chapssal garu)
Instructions
Instructions
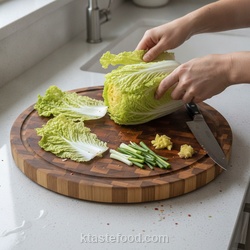
- Prepare the Napa Cabbage: On your **Natural end-grain acacia wood cutting board**, carefully remove any outer, damaged leaves from the 3 large heads of napa cabbage and set them aside. Make a cross-cut (X-shaped incision) halfway through the bottom core of each cabbage. Using your hands, gently tear the cabbage in half vertically, allowing the leaves to separate naturally. This prevents excessive breakage compared to cutting all the way through. Further cut any very large halves into quarters, adjusting size as needed for even brining.
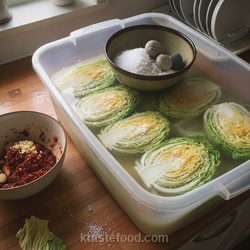
- Brine the Cabbage: In a large brining container or tub, dissolve 2 cups (480g) of coarse sea salt into 1 liter (4.2 cups) of water. Immerse the prepared cabbage pieces into this salt water, ensuring they are thoroughly soaked. Take the remaining 1 cup (240g) of coarse sea salt and sprinkle it evenly between the layers of each cabbage piece, focusing on the thicker white parts. Press the cabbage down firmly and place a heavy plate or bowl filled with water on top to submerge them, helping them brine faster. Allow the cabbage to brine for 3 hours, flipping them twice during this time to ensure even salting. (General rule: 1 cup of salt per large cabbage head).
- Cook the Flour Paste (Puri): In a large stockpot, whisk together 600ml (2.5 cups) of water and 6 tablespoons (50g) of all-purpose flour until smooth. Heat the mixture over medium-low heat, stirring continuously with a wooden spatula, until it thickens into a smooth, translucent paste. This usually takes about 5-7 minutes. Once thickened, remove from heat and let it cool completely. (You can also use sweet rice flour for a chewier texture).

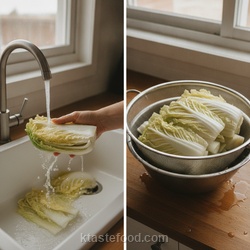
- Rinse and Drain the Brined Cabbage: After 3 hours of brining, the cabbage should be flexible and slightly translucent. Thoroughly rinse the cabbage under cold running water 5 times to remove excess salt. Be gentle to avoid damaging the leaves. Place the rinsed cabbage in a large colander and let it drain for at least 30 minutes to an hour, allowing as much water as possible to drip out. Gently squeeze out any remaining water without tearing the leaves.
- Prepare the Kimchi Paste Aromatics: While the cabbage drains, prepare the aromatic base for the kimchi paste. In a blender or food processor, combine the chopped fresh red chili peppers (200g), peeled garlic (200g), peeled ginger (40g), and roughly chopped onion (350g). Blend until a smooth, thick paste forms. Set aside.
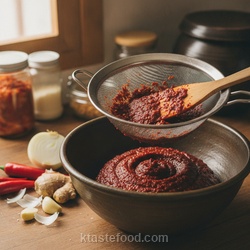
- Assemble the Kimchi Seasoning: In your designated **Extra-Large Stainless Steel Mixing Bowl**, combine the cooled flour paste from Step 3, the blended aromatic paste from Step 5, and the prepped green onions (200g, cut into 5cm pieces). Add 3 cups (360g) of Korean chili flakes (gochugaru), 1/2 cup (120ml) of Korean anchovy sauce, 1/2 cup (120ml) of Korean green plum extract, 1/2 cup (120g) of fermented shrimp paste, 1/2 cup (60g) of chili seeds, and 2 tablespoons of sugar. Mix all ingredients thoroughly with a large spoon or your gloved hands until a uniformly vibrant red paste forms. Allow the paste to rest for 15-20 minutes to let the gochugaru bloom and deepen in color.
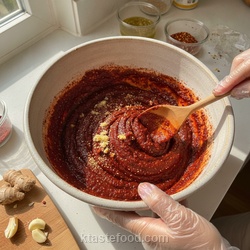
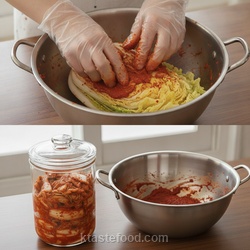
- Coat the Cabbage and Finish: Wearing rubber gloves, take each drained cabbage piece and generously spread the kimchi seasoning paste between every leaf, ensuring full coverage from the white core to the green tips. Once each piece is thoroughly coated, gently fold the cabbage in half or roll it up and place it snugly into airtight fermentation containers. Do not pack too tightly, leave a little room for fermentation gases. Store at room temperature for 1-2 days to begin fermentation, then transfer to the refrigerator for longer storage and continued slow fermentation. Enjoy your authentic homemade Baechu Kimchi!
Notes
Join K-Taste Food
Sign in with Google to explore exclusive Korean recipes and get instant updates.
💡 Smart International Ingredient Substitutions
- Korean Anchovy Sauce (Kkanari Aekjeot): Substitute with Regular Fish Sauce (While not identical, standard fish sauce can provide a similar umami depth. Use a good quality brand.)
- Korean Green Plum Extract (Maesil Cheong): Substitute with Honey or Corn Syrup (mixed with a splash of water) (Maesil Cheong provides a unique sweet-tart flavor. Honey or a diluted corn syrup can mimic the sweetness, though the tartness will be less pronounced.)
- Fermented Shrimp Paste (Saewoo Jeot): Substitute with More Korean Anchovy Sauce (Kkanari Aekjeot) or omit (Saewoo Jeot adds a distinct briny depth and helps fermentation. If unavailable, you can increase the anchovy sauce slightly, or for a vegetarian version, omit and add a touch more salt and sugar, understanding the flavor profile will shift.)
🍽️ Perfect Korean Food Pairings (What to Serve With This)
- Master Fluffy Korean Pot Rice (Naembi Bap) Easily: No Rice Cooker Needed, Just Perfect Grains: The crisp, spicy notes of fresh kimchi are the perfect complement to warm, fluffy pot rice, adding a refreshing crunch and burst of flavor to every spoonful.
- The Secret to Silky, Jiggly Korean Steamed Eggs (Gyeran Jjim): Achieve Pudgy Perfection: The mild, comforting silkiness of Gyeran Jjim offers a delightful textural and flavor contrast to the bold, fermented punch of Baechu Kimchi, balancing the meal beautifully.
- How to Make Tender Korean Boiled Pork (Suyuk) Without Any Gamey Odor: There’s no better pairing for fresh, homemade Baechu Kimchi than tender slices of Suyuk. The crisp, spicy kimchi cuts through the richness of the pork, creating an iconic and incredibly satisfying Korean culinary experience.
❓ Frequently Asked Questions (FAQ)
Q: How long does homemade kimchi last?
Properly stored in an airtight container in the refrigerator, homemade kimchi can last for several months, with its flavor deepening and becoming more sour over time. For optimal freshness and probiotic benefits, it’s best consumed within 1-3 months, but can be enjoyed much longer.
Q: What kind of salt should I use for brining?
It is crucial to use coarse sea salt (also known as pickling salt or Korean coarse salt, ‘cheonilnyeom’). Avoid iodized table salt as it can interfere with the fermentation process and impart an off-flavor.
Q: Can I adjust the spice level of the kimchi?
Absolutely! The amount of Gochugaru (Korean chili flakes) can be adjusted to your preference. For a milder kimchi, reduce the amount to 2 cups; for extra spicy, you can increase it to 3.5 cups. You can also adjust the fresh red chilies in the paste.
Q: My kimchi tastes too salty/sour. What went wrong?
If it’s too salty, it might be due to insufficient rinsing after brining. If it’s too sour, it likely over-fermented at room temperature. For a less sour taste, move it to the refrigerator sooner. If it’s already too sour, you can use it in cooked dishes like kimchi jjigae or kimchi fried rice.
Sister’s Secret Touch: Sister’s Secret Touch: The art of exceptional kimchi lies in a few crucial details. First, **perfect brining** is paramount – the cabbage should be flexible but still retain a slight crispness, not mushy. Rinsing thoroughly after brining is equally important to remove excess salt while retaining flavor. Second, the **flour paste (puri)** isn’t just a binder; it feeds the good bacteria, creating the perfect environment for fermentation and giving the kimchi its desirable ‘gloss’ and depth. Let it cool completely before mixing! Third, allow your finished seasoning paste to **’bloom’** for 15-20 minutes before coating the cabbage; this allows the gochugaru to fully absorb moisture and develop its vibrant color and flavor. Lastly, don’t rush the process! Kimchi is a labor of love that rewards patience and attention to detail, transforming simple ingredients into a complex, living food.
🏷️ Recipe Keywords & Dietary Tags:
Join the K-Taste VIP Food Club
Sign in with Google to save your favorite recipes, create custom meal plans, and get weekly Korean chef secrets delivered to your inbox!